Real Estate Photo Editing Tips: A Complete Guide for Agents & Photographers
Real Estate Photo Editing Tips: A Complete Guide for Agents & Photographers
TL;DR: High-quality photo editing can increase listing views by up to 118% and selling prices by 3-11%. The essential techniques include exposure correction, white balance adjustment, vertical straightening, HDR merging, sky replacement, lawn enhancement, and object removal. AI-powered tools like NeoSpark can reduce editing time from hours to minutes while maintaining professional quality. Optimize images for each platform (Zillow, Realtor.com, MLS) and consider virtual staging for vacant properties. Follow a structured workflow from RAW import to final export for consistent, market-ready results.
Table of Contents
- Why Photo Editing Is Critical for Listings
- Essential Real Estate Photo Editing Techniques
- AI vs Manual Editing
- Step-by-Step Editing Workflow
- Platform Optimization
- Virtual Staging Basics
- Case Studies
- FAQ
- Conclusion
- Related Resources
Why Photo Editing Is Critical for Listings
In today’s digital-first real estate market, your listing photos are your first showing. Potential buyers spend an average of 20 seconds looking at the first photo before deciding whether to scroll further or move on. That single image can make or break a sale.
The numbers tell a compelling story:
| Metric | Professional Photos | Amateur / Unedited | Impact |
|---|---|---|---|
| Online Views | 118% more | Baseline | Higher buyer pool |
| Days on Market | 32% faster | Baseline | Reduced carrying costs |
| Final Sale Price | 3-11% higher | Baseline | Tens of thousands more |
| Buyer Interest | 61% more inquiries | Baseline | More offers, bidding wars |
| Agent Perception | 77% viewed as more reputable | Baseline | Repeat business, referrals |
Sources: National Association of Realtors (2025), Redfin Market Research, VHT Studios Annual Report
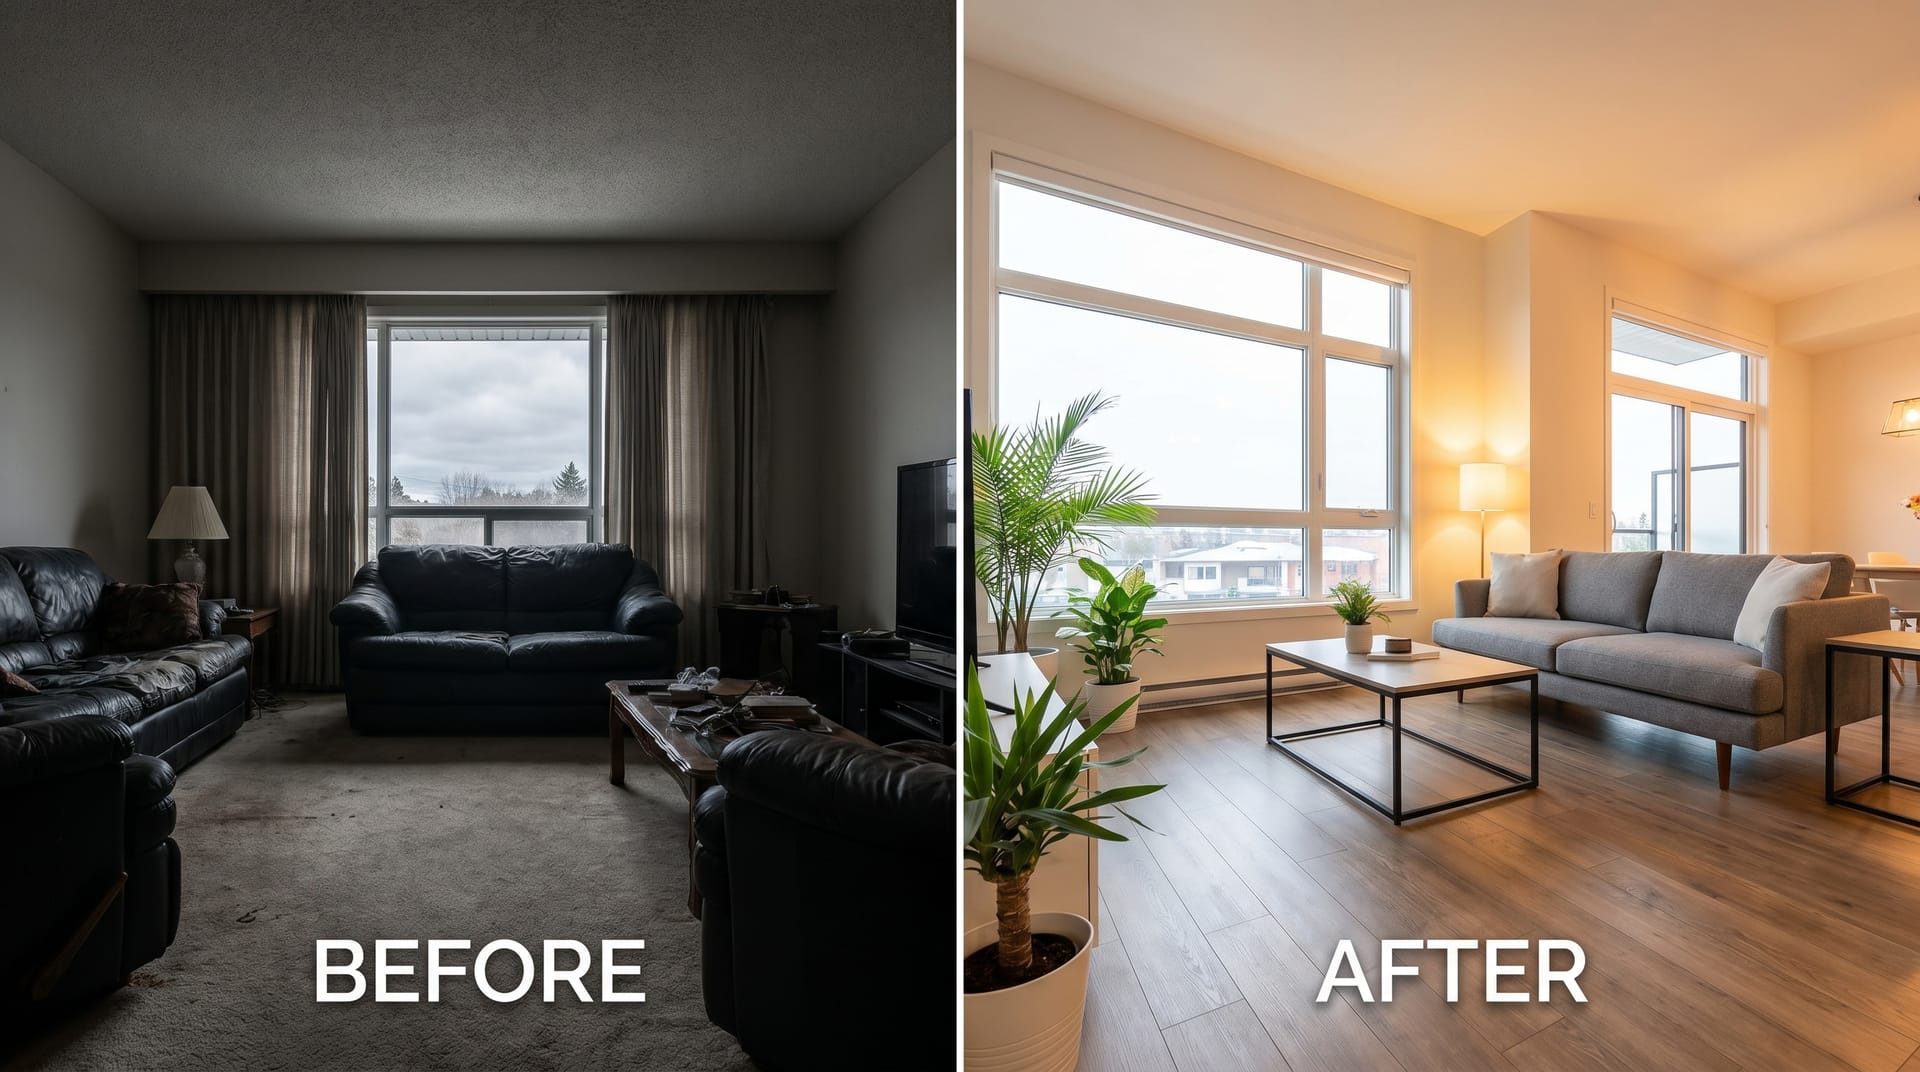
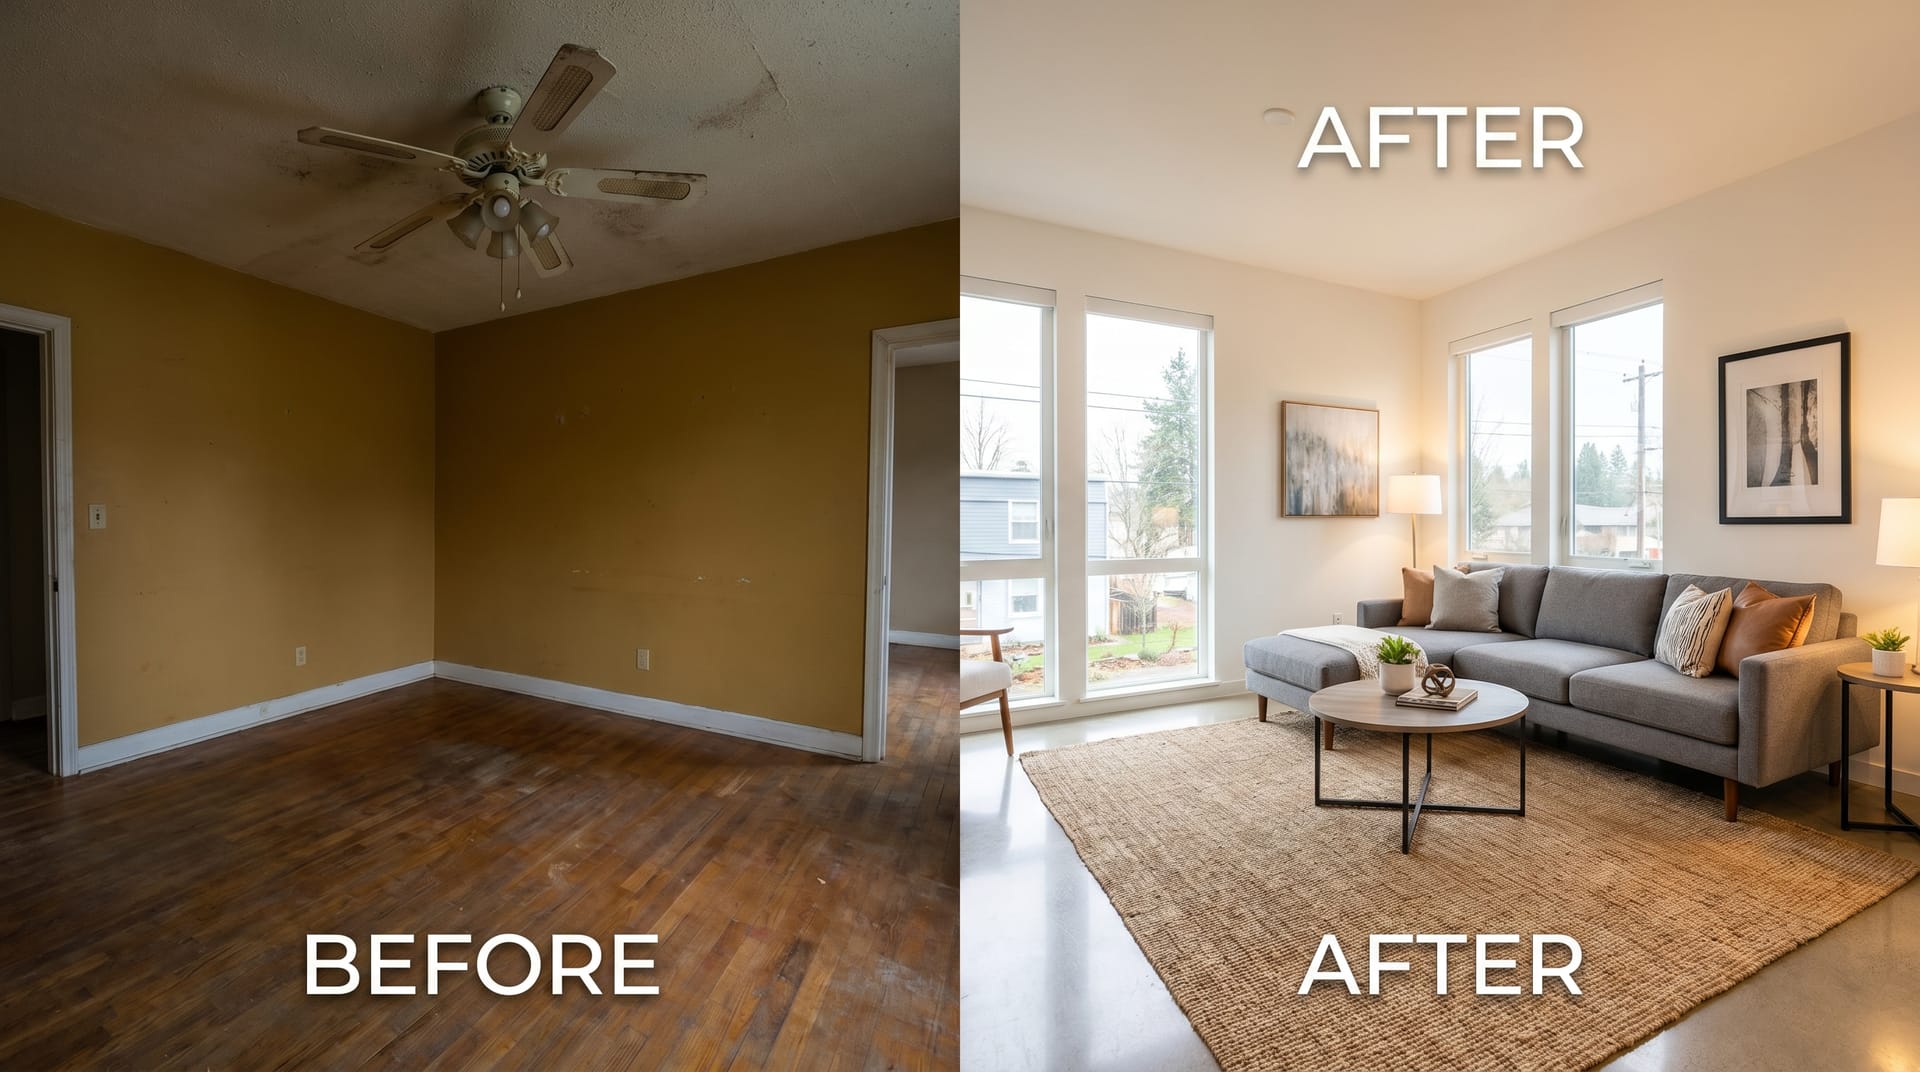
Professional editing transforms raw captures into compelling visual narratives. It corrects the limitations of camera sensors, compensates for challenging lighting conditions, and presents properties in their most appealing light — all while maintaining ethical accuracy.
The bottom line: editing is not an optional extra. It is a fundamental component of modern real estate marketing that directly impacts your bottom line.
Essential Real Estate Photo Editing Techniques
Mastering these seven core techniques will elevate your listing photos from adequate to exceptional. Each addresses a specific challenge common in property photography.
Exposure Correction
Camera sensors cannot match the dynamic range of human vision. Interiors with windows, shaded exteriors on bright days, and mixed lighting all create exposure challenges.
Key practices:
- Shoot in RAW format to preserve maximum tonal information
- Use histogram analysis to identify clipped highlights and crushed shadows
- Apply graduated filters for window-heavy rooms
- Target a balanced histogram without extreme left or right clipping
- Lift shadows moderately; over-lifting introduces noise
Pro tip: For rooms with large windows, bracket your exposures (typically -2, 0, +2 EV) and merge using HDR techniques described below.
White Balance
Incorrect white balance makes rooms appear unnaturally warm (orange) or cool (blue), distorting the true character of the space.
Key practices:
- Set custom white balance in-camera using a gray card when possible
- In post-processing, use the eyedropper tool on neutral surfaces (white trim, gray countertops)
- Maintain consistency across all photos from the same property
- Tungsten lighting typically requires 2500-3200K correction
- Daylight interiors usually sit between 5000-6500K
Common mistake: Over-correcting to pure white walls. Slight warmth (5200-5500K) often feels more inviting for residential spaces.
Vertical Straightening
Converging verticals — where walls appear to lean inward or outward — immediately signal amateur photography. This distortion occurs when the camera is tilted up or down relative to the subject.
Key practices:
- Enable in-camera electronic level when shooting
- In post-processing, use lens correction profiles specific to your camera and lens
- Apply manual vertical perspective correction
- Ensure door frames, window edges, and corners of rooms are perfectly vertical
- Leave minimal headroom (ceiling space) to avoid excessive cropping after correction
Technical note: Extreme perspective correction reduces effective resolution. Shoot with a slightly wider focal length than needed to allow for post-processing crop.
HDR Merging
High Dynamic Range (HDR) photography combines multiple exposures to capture detail in both the darkest shadows and brightest highlights.
Key practices:
- Capture 3-7 bracketed exposures, 1-2 stops apart
- Use a tripod to ensure perfect alignment between frames
- Merge using dedicated HDR software (Photomatix, Aurora HDR) or built-in tools (Lightroom, Photoshop)
- Apply tone mapping conservatively; avoid the “cartoon” HDR look
- Natural HDR should look like what the eye sees, not surreal art
When to use HDR: Essential for interiors with windows showing exterior views, sunset exteriors, and any scene with brightness variation exceeding 5 stops.
When to avoid: Simple rooms with even lighting, where a single well-exposed RAW file provides sufficient latitude.
Sky Replacement
Gray, overcast skies drain the energy from exterior shots. Sky replacement adds visual appeal without misrepresenting the property itself.
Key practices:
- Only replace skies on genuinely poor-weather days — never substitute a sunny sky for a property that faces persistent shade
- Match the lighting direction and color temperature of the replacement sky to the scene
- Use AI-powered tools (NeoSpark, Adobe Sky Replacement) for clean edge detection around trees, chimneys, and architectural details
- Adjust shadows and highlights on the building to match the new sky’s light source
- Keep skies realistic; avoid dramatic sunsets for standard listings unless the property genuinely faces west
Ethical boundary: Sky replacement is widely accepted in real estate photography. However, disclose if asked, and never use it to hide structural defects or unfavorable surroundings.
Lawn Enhancement
Brown patches, seasonal dormancy, and uneven growth detract from curb appeal. Lawn enhancement corrects these issues digitally.
Key practices:
- Use targeted color adjustments (HSL panel) to shift yellow/brown grass toward green
- Apply localized adjustments rather than global color shifts
- For severe cases, use AI lawn replacement tools that generate realistic grass texture
- Match the enhanced lawn to the season — deep green in summer, slightly muted in spring/fall
- Ensure consistency between lawn and surrounding landscaping
Best practice: Schedule shoots during growing season when possible. Digital enhancement is a backup, not a substitute for good timing.
Object Removal
Clutter, vehicles, temporary construction, and distracting elements compete with the property for attention.
Key practices:
- Remove cars from driveways and streets when possible (shoot at optimal times or edit out)
- Eliminate trash cans, garden hoses, and personal items
- Use clone stamp and healing brush for small objects
- Deploy AI inpainting (NeoSpark, Photoshop Generative Fill) for complex removals
- Check reflections in windows and mirrors for missed objects
What to remove vs. keep: Remove temporary, personal, or distracting items. Keep permanent fixtures and architectural features, even if slightly imperfect.
AI vs Manual Editing
The emergence of AI-powered editing tools has transformed real estate photography workflows. Understanding the trade-offs helps you choose the right approach for each project.
| Factor | AI-Powered Editing | Manual Editing |
|---|---|---|
| Speed | 1-3 minutes per image | 15-45 minutes per image |
| Cost per Image | $0.10 - $0.50 | $3 - $15 (editor time) |
| Consistency | High -- same algorithm across batch | Variable -- depends on editor fatigue |
| Complex Scenes | Good for standard interiors/exteriors | Superior for unusual angles, custom architecture |
| Learning Curve | Minimal -- one-click presets | Steep -- months to master software |
| Customization | Moderate -- adjustable parameters | Unlimited -- pixel-level control |
| Best For | High-volume agents, quick turnarounds | Luxury listings, portfolio work, fine art prints |
The hybrid approach: Many professionals now use AI for baseline corrections (exposure, white balance, straightening) and manual editing for finishing touches and complex adjustments. NeoSpark’s AI engine handles 80% of standard corrections automatically, allowing photographers to focus creative energy on the remaining 20%.
Step-by-Step Editing Workflow
A structured workflow ensures consistency, efficiency, and professional results every time. Adapt this framework to your specific tools and property types.
Step 1: Import and Organize
- Import RAW files into your editing platform
- Rename files systematically (e.g.,
123_Main_St_Kitchen_01) - Apply star ratings to select the best frames from each angle
- Create a backup before any edits
Step 2: Global Corrections
- Apply lens correction profiles
- Correct vertical perspective
- Adjust exposure using histogram as guide
- Set white balance consistently across the set
- Apply noise reduction for high-ISO interior shots
Step 3: Local Adjustments
- Use graduated filters for window light control
- Apply radial filters to brighten dark corners
- Brush adjustments for specific problem areas
- Remove distractions with clone/healing tools
Step 4: Enhancement
- Merge HDR brackets if applicable
- Replace skies on exterior shots
- Enhance lawns and landscaping
- Apply subtle sharpening (avoid halos around edges)
Step 5: Final Review
- Check at 100% magnification for artifacts
- Verify vertical lines on all architectural shots
- Confirm color consistency across the entire gallery
- Ensure no ethical issues (hidden defects, misleading perspectives)
Step 6: Export
- Export at platform-specific dimensions (see next section)
- Apply appropriate sharpening for web output
- Save high-resolution masters for print marketing
- Deliver in requested format (JPEG, WebP)
Time allocation: A 25-photo listing should take 30-60 minutes with AI-assisted workflow, or 3-5 hours with fully manual editing.
Platform Optimization
Each real estate platform has specific image requirements that affect how your photos display. Optimizing for each ensures maximum visual impact.
| Specification | Zillow | Realtor.com | MLS (Typical) |
|---|---|---|---|
| Max Resolution | 2048 x 1536 px | 1600 x 1200 px | 1024 x 768 px |
| Max File Size | 10 MB | 5 MB | 1-2 MB |
| Accepted Formats | JPEG, PNG | JPEG, PNG | JPEG only |
| Aspect Ratio | 4:3 preferred | 4:3 preferred | 4:3 standard |
| Color Space | sRGB | sRGB | sRGB |
| Photo Limit | 100 photos | 75 photos | 25-50 photos |
| Display Priority | Hero image + gallery | First 5 images critical | Sequential listing |
Optimization strategy: Export at the highest resolution accepted by your primary platform, then create downsampled versions for MLS. Always lead with your strongest exterior shot — it serves as the thumbnail across search results and social sharing.
File naming: Include the property address in image filenames. This improves SEO when images are indexed by search engines and helps with organization.
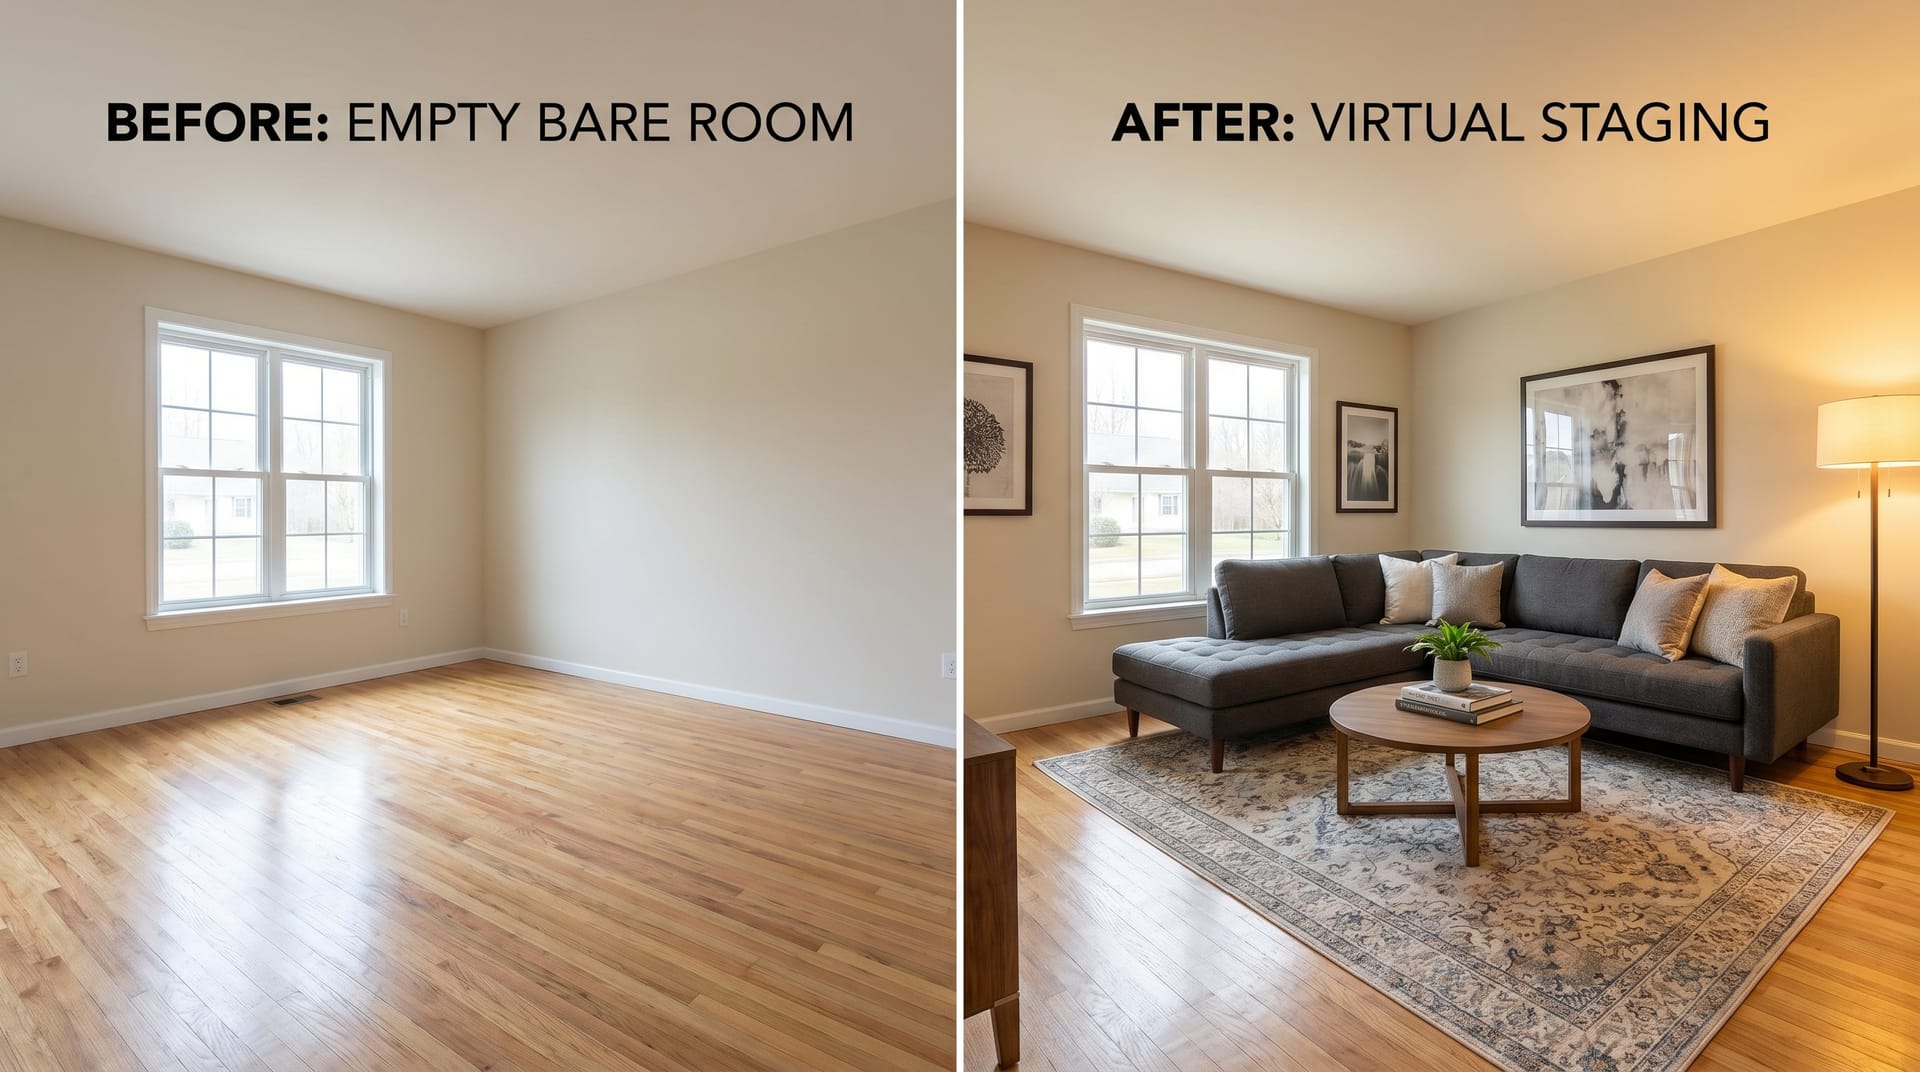
Virtual Staging Basics
Virtual staging digitally furnishes vacant properties, helping buyers visualize space potential without the cost of physical staging ($2,000-$5,000 per property).
When to Use Virtual Staging
- Vacant properties that feel cold or uninviting
- New construction without model units
- Properties with dated furniture that detracts from the space
- Online listings where physical staging is cost-prohibitive
Style Selection
Match the virtual furniture style to the property and target buyer:
- Contemporary/Modern: Clean lines, neutral palettes, minimal decor
- Traditional: Classic furniture, warm tones, layered textures
- Coastal: Light colors, natural materials, airy feel
- Industrial: Exposed elements, metal accents, utilitarian pieces
- Farmhouse: Rustic touches, comfortable seating, homey atmosphere
Technical Best Practices
- Maintain accurate scale — furniture must fit realistically within room dimensions
- Match lighting direction and intensity to the actual space
- Use shadows that correspond to window placement
- Avoid overcrowding; leave walking paths and visual breathing room
- Disclose that images are virtually staged in listing description
Cost Comparison
| Method | Cost | Turnaround | Flexibility |
|---|---|---|---|
| Physical Staging | $2,000 - $5,000+ | 3-7 days | Limited -- one style per staging |
| Traditional Virtual Staging | $50 - $150/room | 1-3 days | Moderate -- style selection from catalog |
| AI Virtual Staging (NeoSpark) | $5 - $20/room | Minutes | High -- instant style variations |
ROI insight: Virtually staged homes sell 73% faster than vacant listings, and 83% of staged properties sell at or above asking price according to the Real Estate Staging Association.
Case Studies
Case Study 1: Sarah Chen, Residential Agent, Seattle WA
Challenge: Sarah listed a $850,000 craftsman home in a competitive Seattle neighborhood. Initial listing with smartphone photos generated 12 showings in two weeks with no offers.
Action: Sarah invested in professional photography and used NeoSpark’s AI editing suite for rapid turnaround. Key edits included:
- HDR merging for the window-filled living room
- Sky replacement on overcast exterior shots
- Virtual staging for the vacant master bedroom and dining room
- Lawn enhancement for the dormant winter grass
Results:
- Relisted with professional photos on a Thursday
- 47 showings scheduled over the weekend
- Multiple offers by Monday
- Closed at $875,000 — $25,000 above asking
Sarah’s takeaway: “The investment in editing paid for itself ten times over. The virtual staging especially helped buyers see the home’s potential. One buyer told me they almost skipped the listing because the original photos made the rooms look smaller than they were.”
Case Study 2: Marcus Williams, Property Photographer, Austin TX
Challenge: Marcus operated a one-person photography business serving 15-20 agents. Manual editing consumed 20-25 hours weekly, limiting his capacity and creating burnout.
Action: Marcus integrated NeoSpark’s batch editing API into his workflow:
- Automated exposure correction and white balance across entire shoots
- AI sky replacement for all exterior shots
- One-click vertical straightening
- Preset-based enhancements for consistent style
Results:
- Editing time reduced from 25 hours to 4 hours weekly
- Capacity increased from 20 to 45 listings monthly
- Revenue increased 125% without hiring additional editors
- Client satisfaction scores improved (faster turnaround)
- Marcus redirected saved time to business development and shooting
Marcus’s takeaway: “I was skeptical about AI editing quality. After testing against my manual work, I couldn’t tell the difference on 90% of standard shots. I now reserve manual editing for luxury listings and complex architectural shots where the premium is justified.”
FAQ
How much does professional real estate photo editing cost?
Costs vary by service level and volume. AI-powered editing through platforms like NeoSpark ranges from $0.10-$0.50 per image for basic corrections, or $5-$20 per room for virtual staging. Traditional manual editing services charge $3-$15 per image. Most agents find that professional editing pays for itself through faster sales and higher prices.
Can I edit real estate photos on my phone?
Yes, for basic adjustments. Apps like Lightroom Mobile, Snapseed, and NeoSpark Mobile handle exposure, white balance, and cropping. However, for complex edits (HDR merging, sky replacement, virtual staging), desktop software or cloud-based AI platforms provide superior results. Use mobile editing for quick social media posts and desktop/AI tools for listing photos.
Is virtual staging considered misleading?
Virtual staging is ethical and widely accepted when properly disclosed. Best practices include: stating “virtually staged” in the listing description, providing un-staged photos in the gallery, and ensuring furniture scale is accurate. Never use virtual staging to hide defects, alter room dimensions, or misrepresent the property’s condition.
What is the best software for real estate photo editing?
The best tool depends on your needs and budget:
- Adobe Lightroom + Photoshop: Industry standard, steep learning curve, subscription model
- NeoSpark: AI-first platform designed for real estate, fastest workflow, competitive pricing
- Photomatix / Aurora HDR: Specialized for HDR merging
- Luminar: Good balance of AI features and manual control
- GIMP: Free alternative for budget-conscious users
How long should real estate photo editing take?
With AI-assisted workflows, a standard 25-photo listing takes 30-60 minutes. Manual editing requires 3-5 hours for the same set. Luxury listings with extensive retouching may take longer regardless of method. Establish turnaround expectations with clients — same-day delivery is achievable with AI tools.
Should I shoot RAW or JPEG for real estate?
Always shoot RAW. RAW files contain significantly more tonal information, allowing recovery of blown highlights and shadow detail impossible with JPEG. The flexibility for white balance correction alone justifies the larger file sizes. Modern cameras and storage make RAW workflow practical for any volume.
Do I need a professional photographer, or can I shoot listings myself?
For properties under $300,000 or rental listings, a skilled agent with a wide-angle lens and basic editing can achieve acceptable results. For properties above $300,000, professional photography consistently delivers ROI through higher sale prices and faster transactions. The photographer’s equipment, lighting knowledge, and editing expertise justify the $200-$500 investment.
Conclusion
Real estate photo editing is no longer a luxury — it is a competitive necessity. The techniques covered in this guide form a complete toolkit for transforming raw captures into compelling listing imagery that drives buyer engagement and maximizes sale prices.
6 Key Takeaways
-
Invest in quality first impressions: Your lead photo determines whether buyers engage further. Make it count with proper exposure, straight verticals, and appealing composition.
-
Master the seven core techniques: Exposure correction, white balance, vertical straightening, HDR merging, sky replacement, lawn enhancement, and object removal address 95% of real estate editing needs.
-
Embrace AI for efficiency: AI-powered tools like NeoSpark handle routine corrections in minutes, freeing your time for high-value activities. The hybrid AI-plus-manual approach optimizes both quality and speed.
-
Optimize for every platform: Export at platform-specific resolutions and formats. Zillow, Realtor.com, and MLS each have different requirements that affect display quality.
-
Leverage virtual staging strategically: Vacant properties sell 73% slower. Virtual staging at $5-$20 per room delivers physical staging results at a fraction of the cost.
-
Maintain ethical standards: Edit for enhancement, not deception. Disclose virtual staging, preserve accurate room proportions, and never hide material defects.
The agents and photographers who thrive in 2026 and beyond will be those who combine technical editing skills with smart AI adoption. Start implementing these real estate photo editing tips today, and watch your listings rise above the competition.
Related Resources
- NeoSpark AI Photo Editor — Transform your real estate photos with AI-powered enhancement, sky replacement, and object removal
- Virtual Staging Guide — Deep dive into digital furniture placement and room visualization
- HDR Photography Tutorial — Master bracketing and tone mapping for interior shots
- Property Photography Equipment Guide — Cameras, lenses, and accessories for real estate shooters
- NeoSpark for Real Estate Agents — Dedicated solutions for listing optimization and marketing automation
- Listing Photo Best Practices Checklist — Downloadable PDF for pre-shoot preparation